I had been looking for a walk that took me off the paths and away from the beaten track, requiring a bit of navigation and of course, it needed to offer points of interest and great views. I was scrolling through my social media, when an article about the US Navy PB4Y-1 Liberator Aircraft crash popped up. A visit to the site appeared to offer all the facets I was looking for and so I cracked out my map and planned a route.
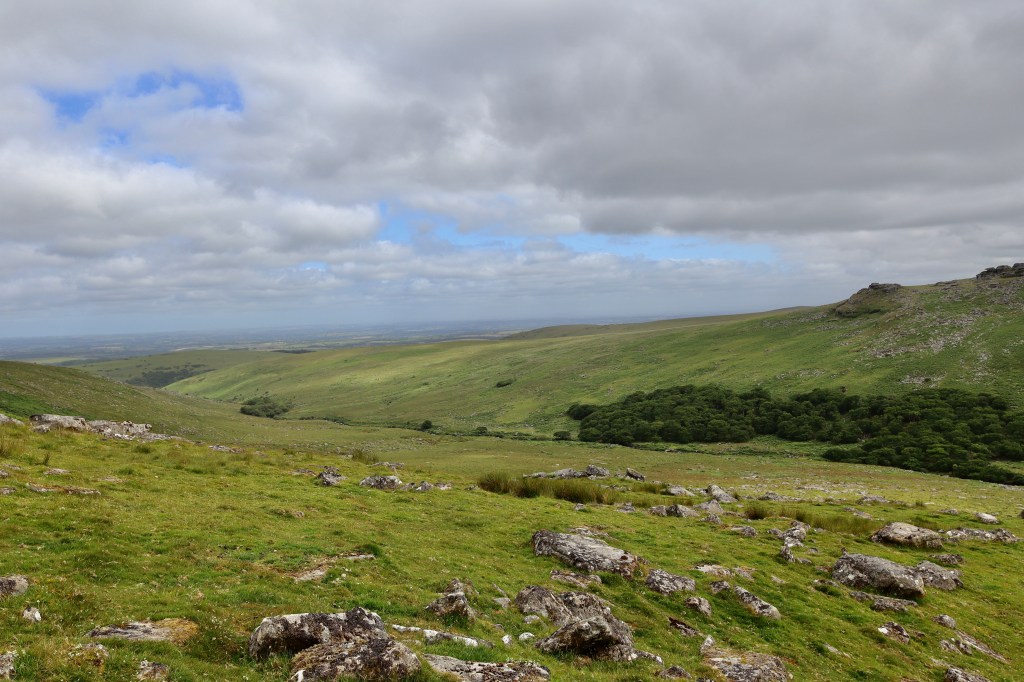
There were a couple of potential routes of entry to where the site was noted, on the Southwestern banks of the West Okement River, beneath Corn Ridge. The route I decided on, was to enter the West Okement Valley from below Shelstone Tor. As such, my route started on Prewley Moor.
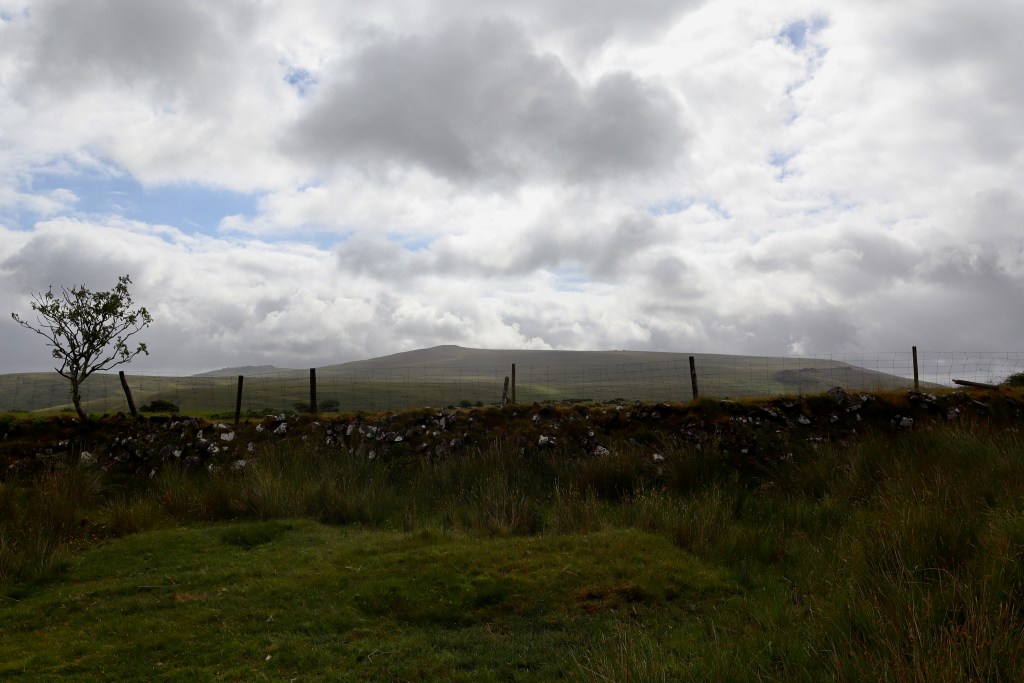
I’ve been to Prewley Moor on a few occasions, as it provides superb access onto Dartmoor’s high moorland, is served by the West Devon Way, Two Castles Trail, Dartmoor Way and Granite Way, has an abundance of great pubs nearby and is easily accessible. Often, when parking up on the Moor, you enter immediately onto the wilds of the moorland but on this occasion, I was surprised to see wooden fences and plastic signs. This is because SW water are laying new pipes. There was something jarring about seeing the newly erected wooden fences keeping sheep and walkers off certain parts and whilst only temporary, does highlight the need for us to protect our open spaces. Walking through the paths that the fences have created, I soon leave them behind and start walking through cows and sheep with swifts showing off their acrobatic displays, all in front of Sourton Tors and the imposing Corn Ridge and it feels much more like the moors.

Shelstone Tor
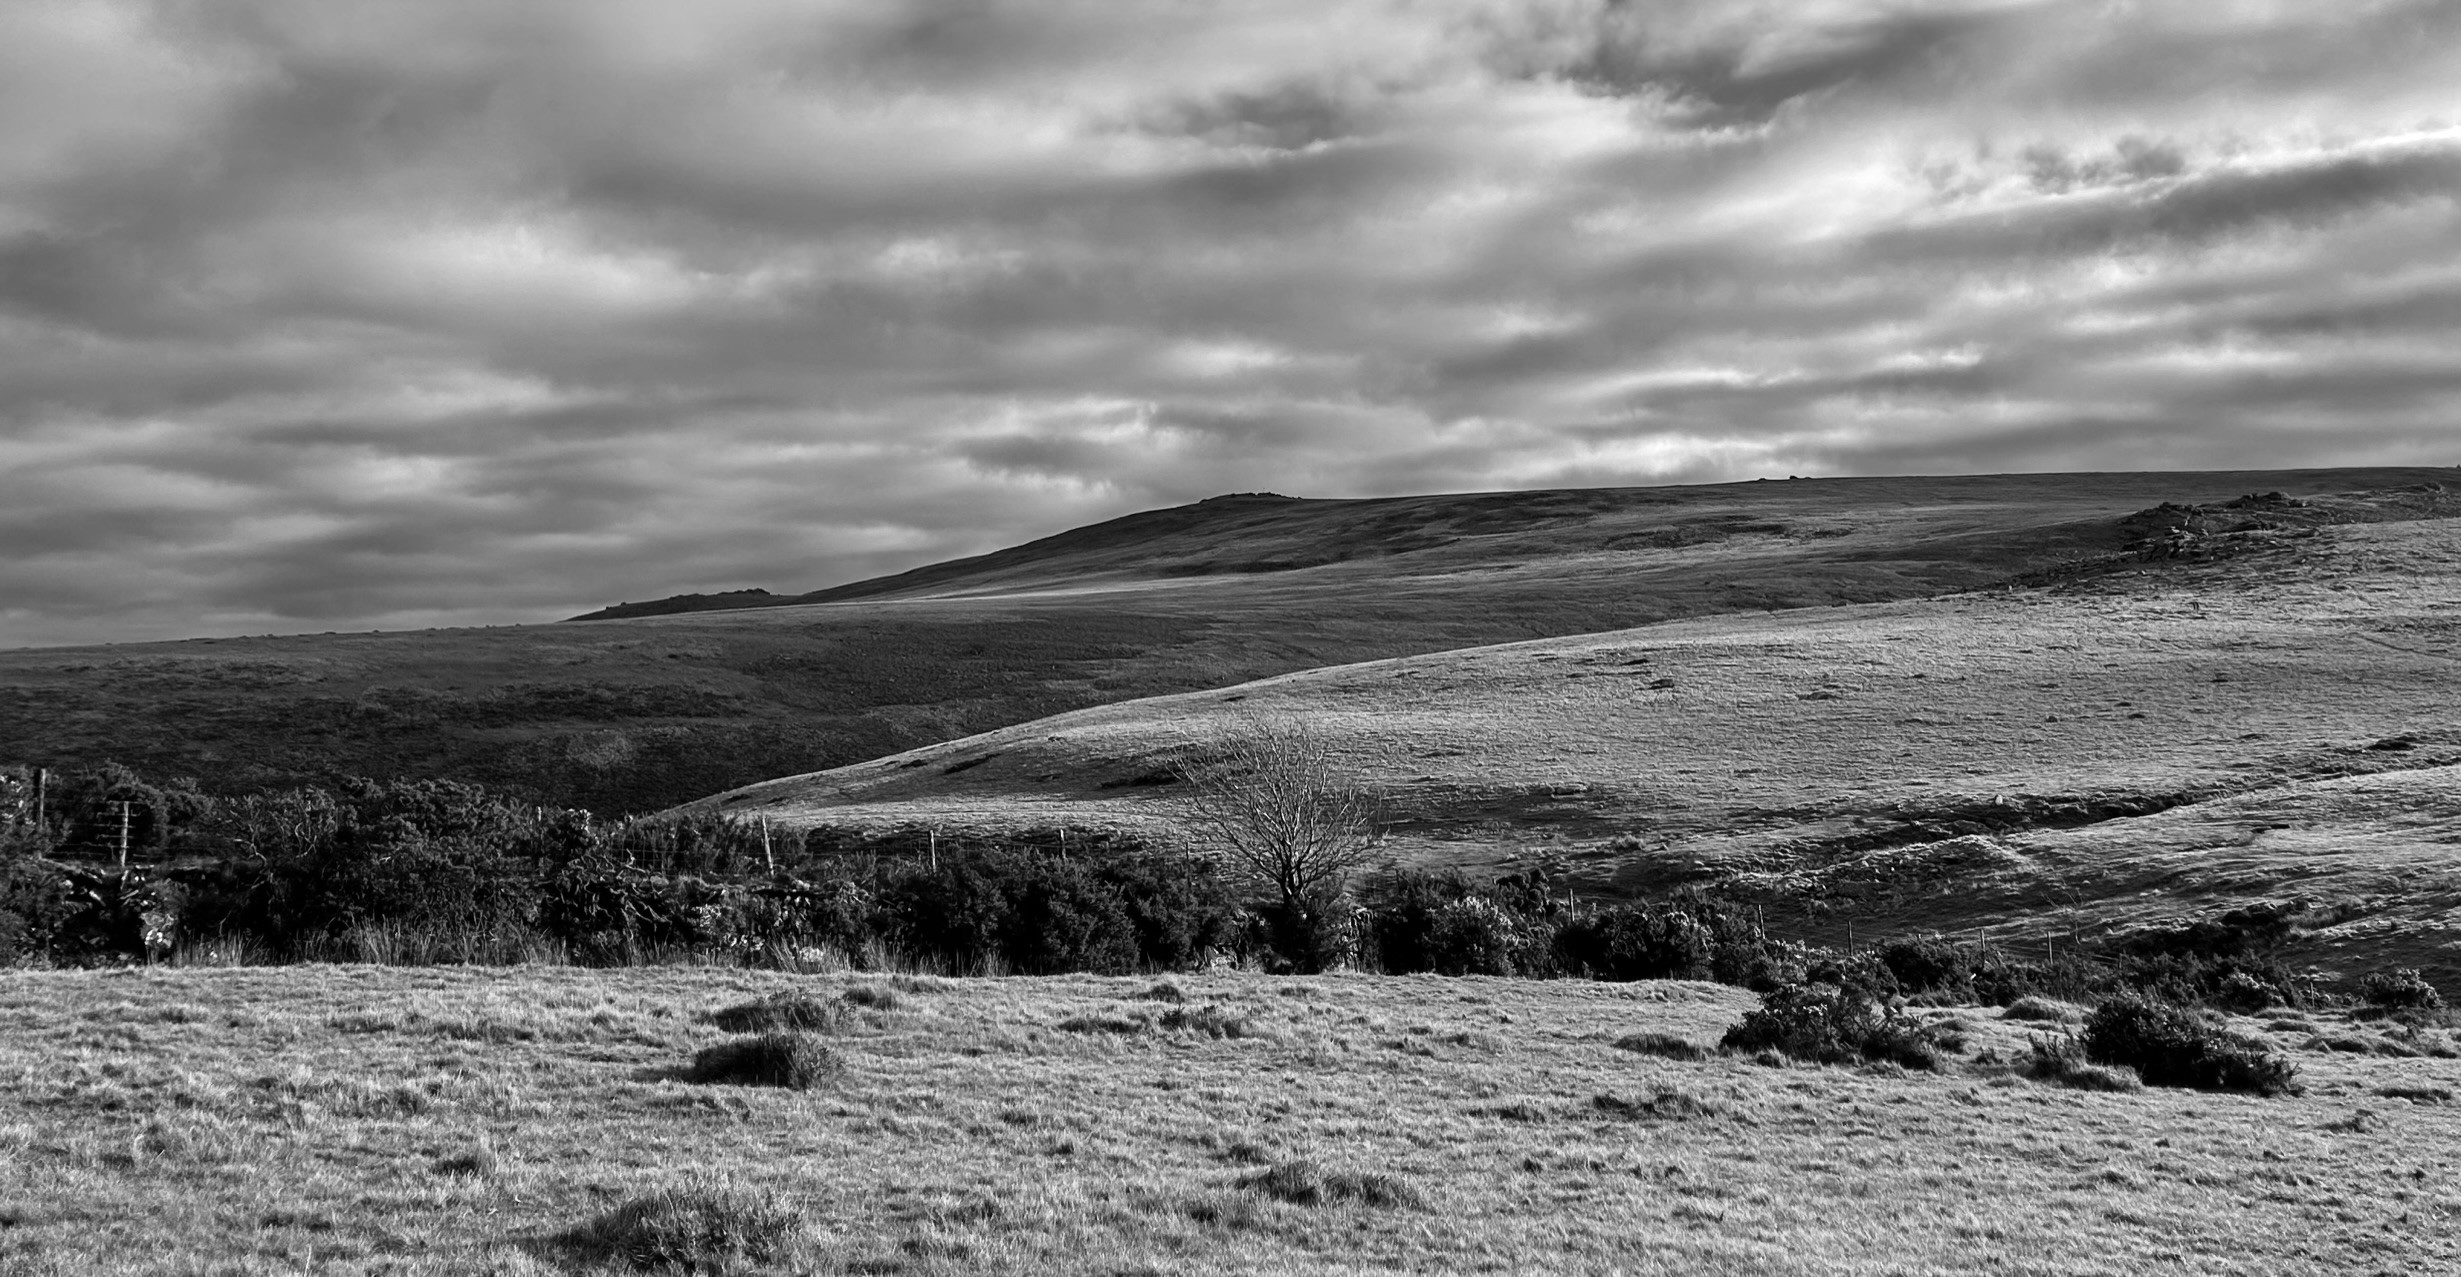
Handrailing the afore mentioned dry stone wall, I head on a southeast bearing, leaving the wall as it turns to the northwest and head to my first destination, Shelstone Tor. The route to Shelstone Tor from the car park, over the boggy ground gives amazing views over to the East, of Okehampton common. These views are dominated by Yes Tor, with High Willhays and West Mill Tor acting as wilful participants. The view is framed by moody looking clouds, a lone hawthorn and the boundary of the aforementioned dry-stone wall, showing what Dartmoor is all about – wilderness, perseverance and dogged determination.
As I leave the wall, a path helpfully shows a route across the start of what becomes a steep sided valley, and draws the eye inexorably towards Meldon reservoir, over the rounded crisscrossing of Homerton, South Down and Longstone Hills. Crossing the valley, I make a beeline for Shelstone tor. Diverting only to avoid putting myself ankle deep in a bog. This area of the moor is stunning in its untamed wildness but does require a bit of concentration to find yourself safely through.
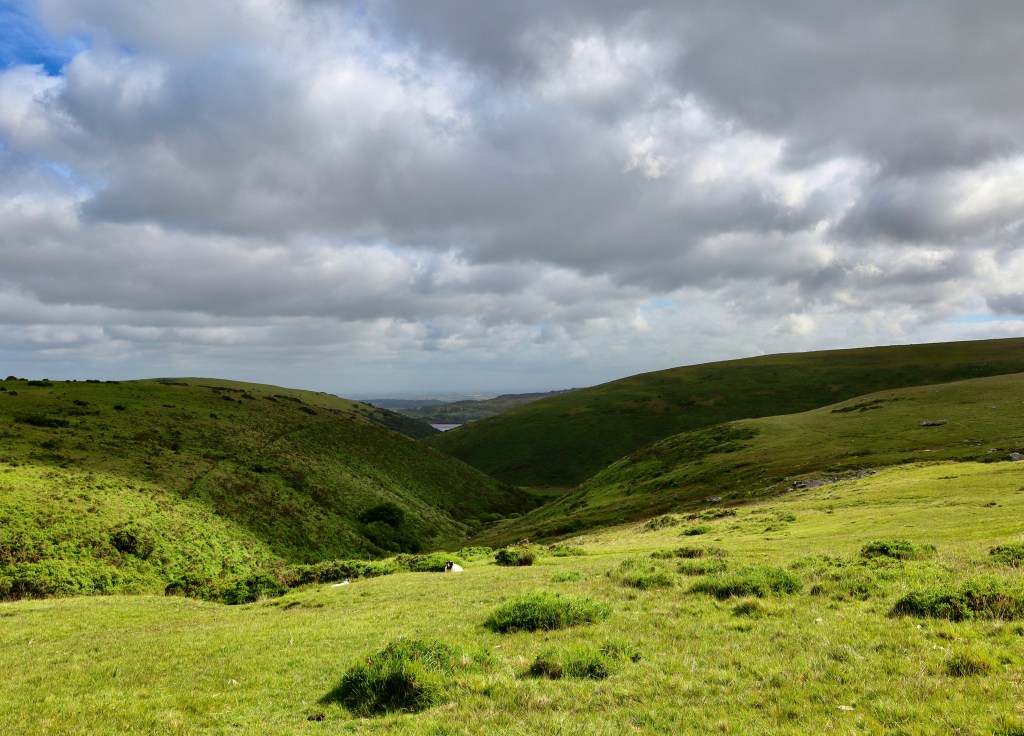
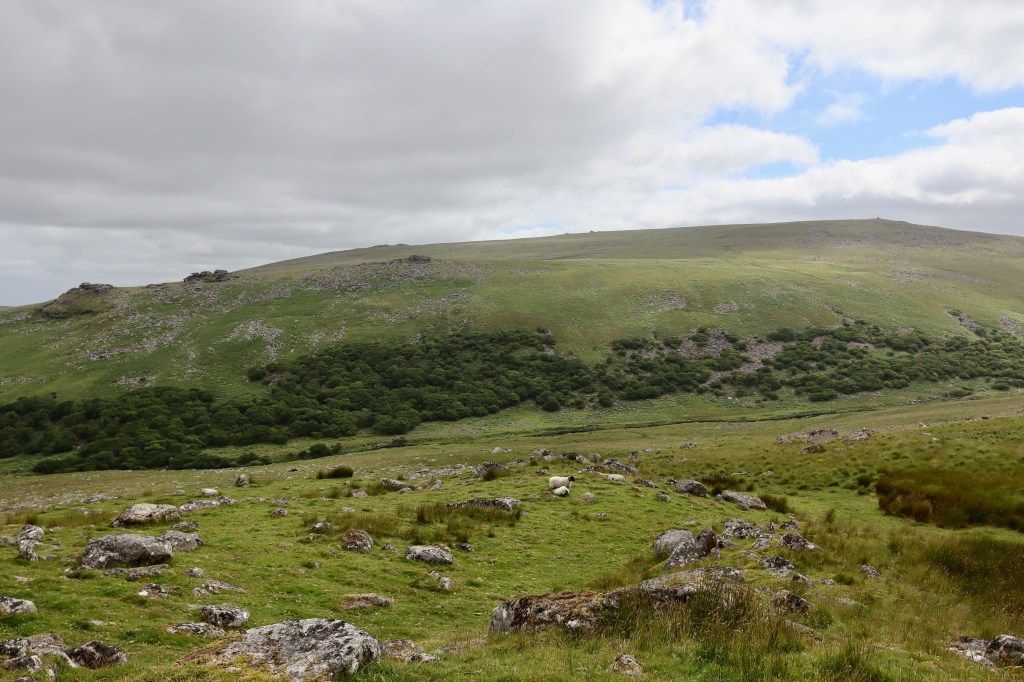
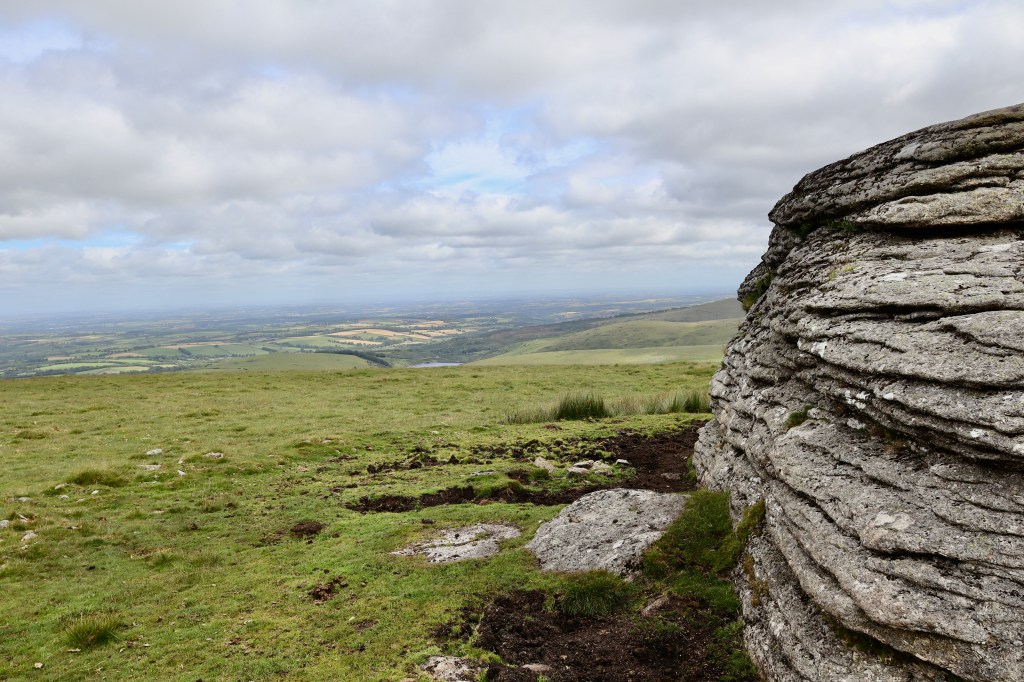
Shelstone Tor is low lying, sitting on the edge of a bowl feature beneath Corn Ridge, with its clitter strewn all around suggesting this was much once grander than it currently is. That being said, from afar Shelstone Tor is striking, acting as a warmup for those that sit over it, Black Tor, High Willhays and Yes Tor. From closer up, Shelstone Tor is remarkable, with numerous rocky outcrops, one of which boasts its own Logan Stone, offering shelter from the inevitable inclement weather from any direction. In reality, Shelstone Tor, acts far from the warmup act I’ve described it as. It stands like a granite-clad scout, high above the West Okement river, boasting one of the best vantage points from which to view the river’s winding journey to Meldon Reservoir.

The Slipper Stones
The purpose of this walk is to find the liberator crash site which is found beneath Corn Ridge. Shelstone Tor sits at the start of this ridge and offers what appears to be (at least when looking on a map) the easiest route in. So from Shelstone Tor, I head downhill towards the southwestern bank of the West Okement River.
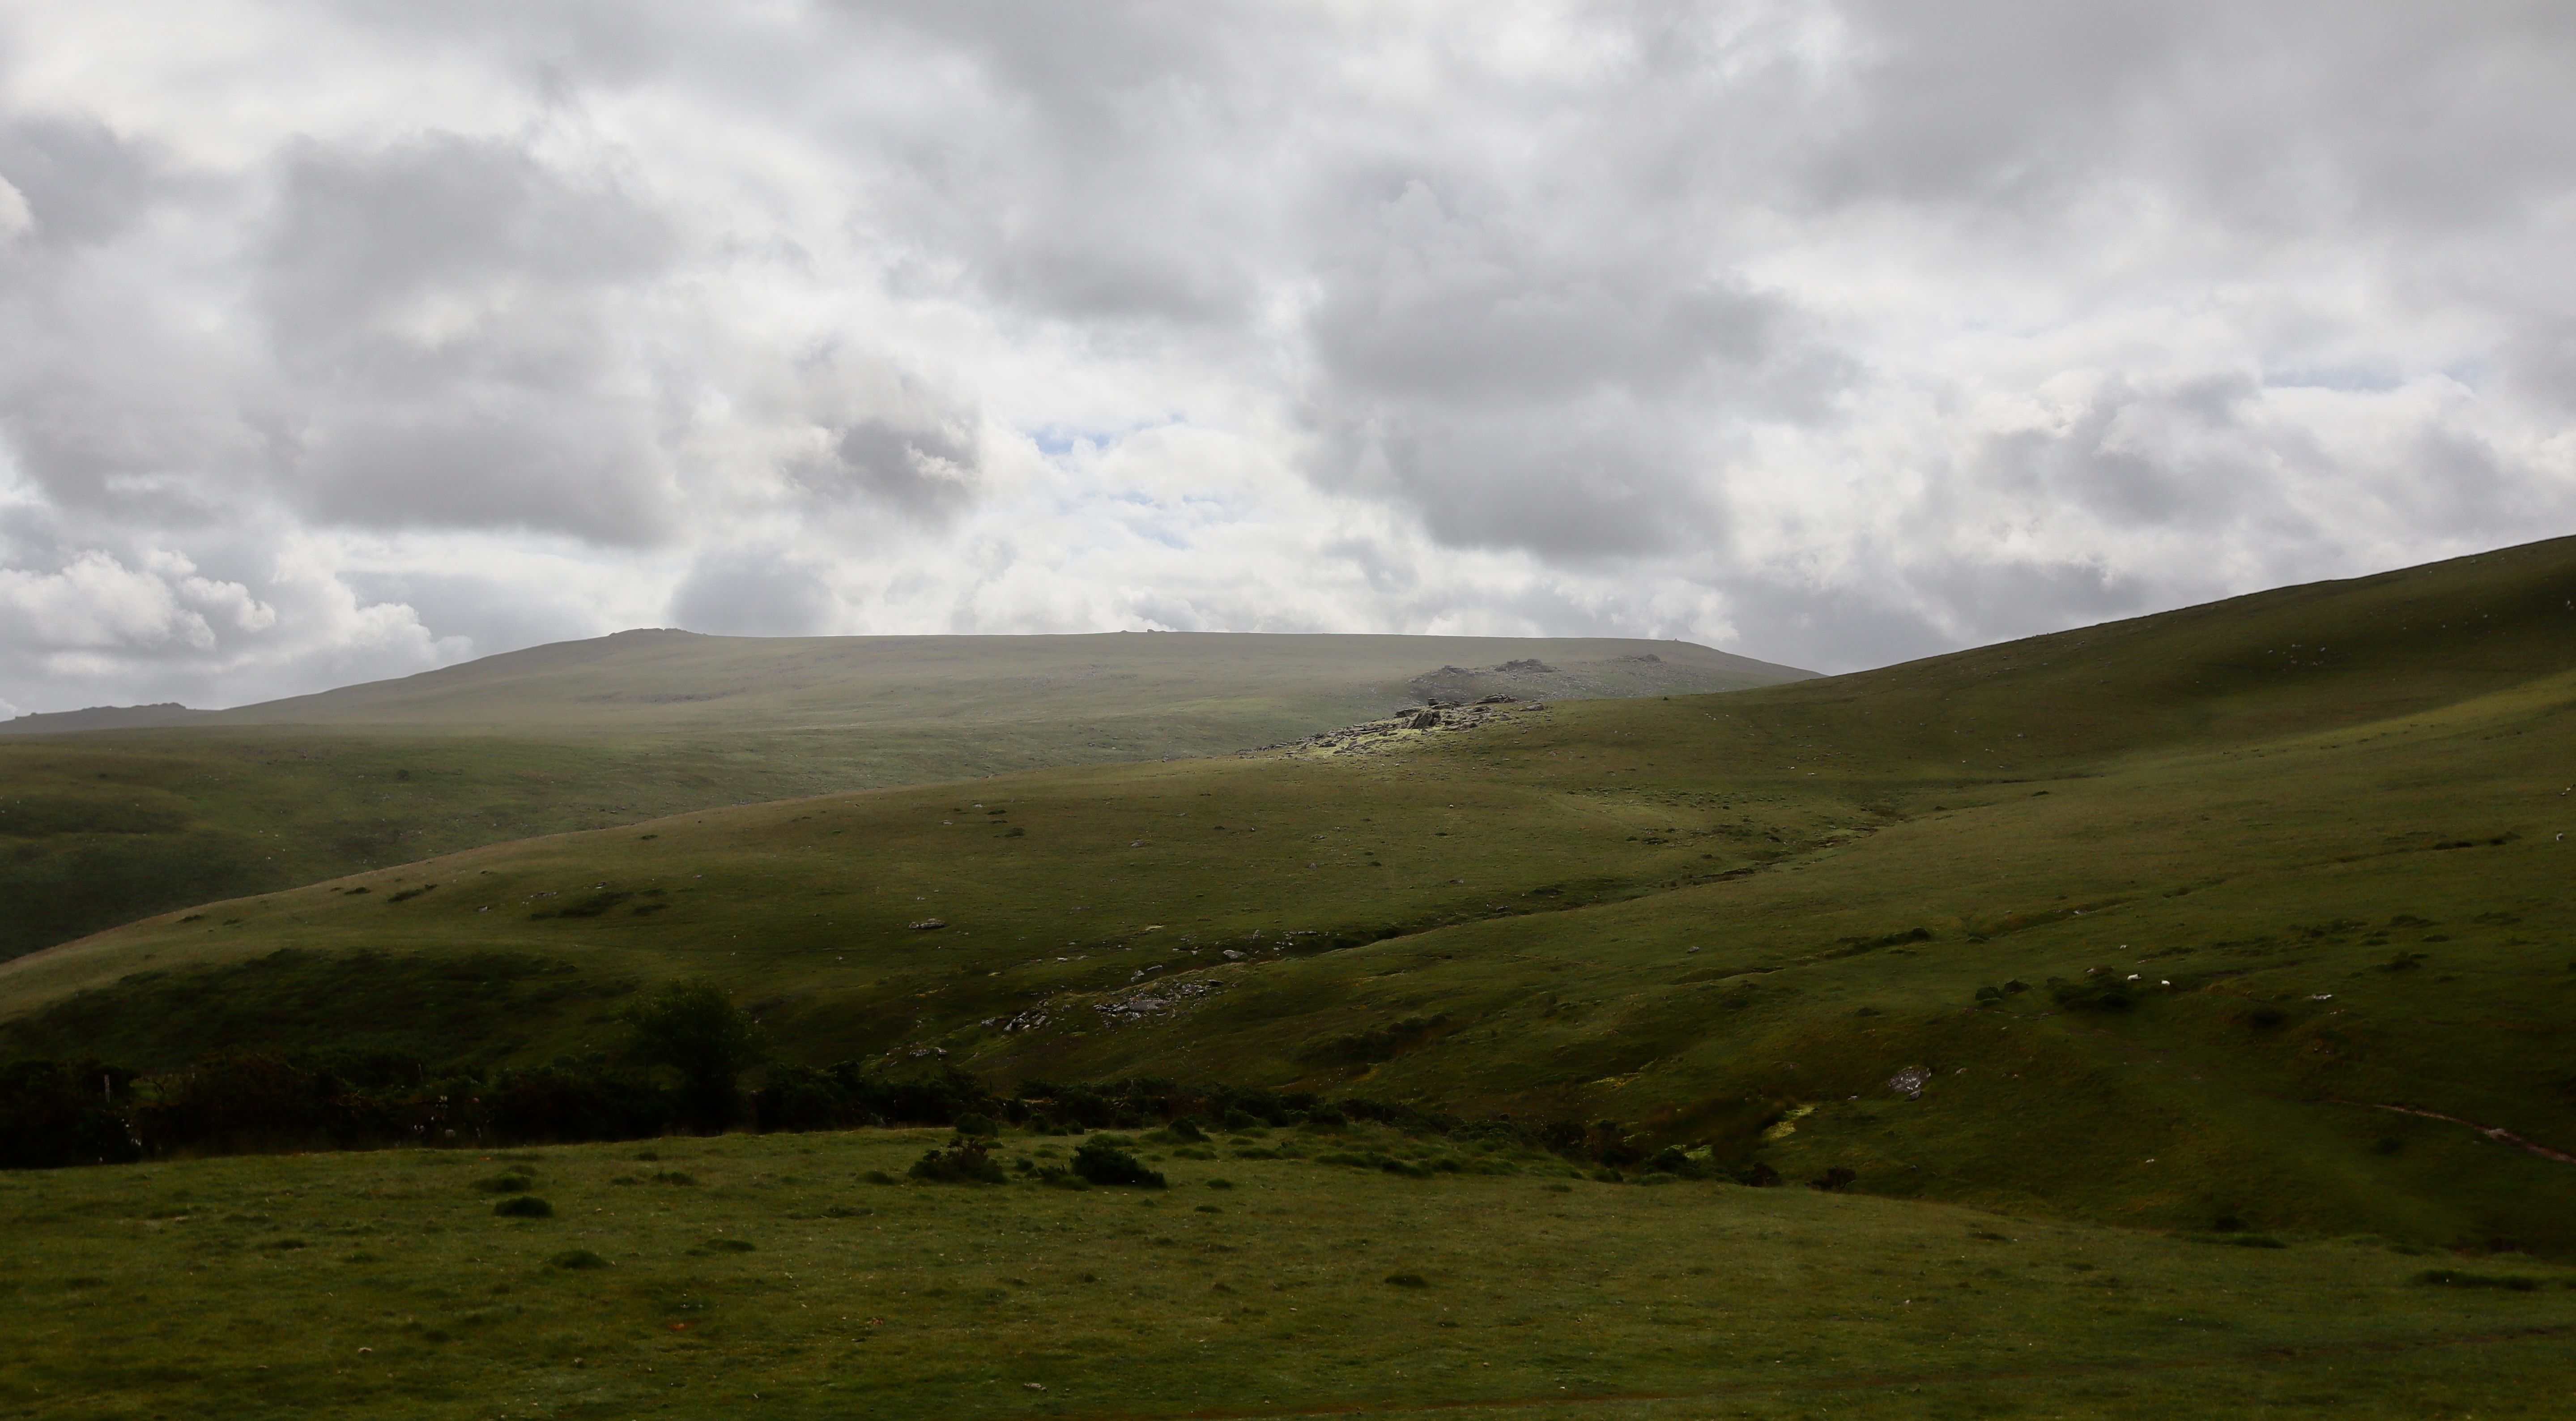
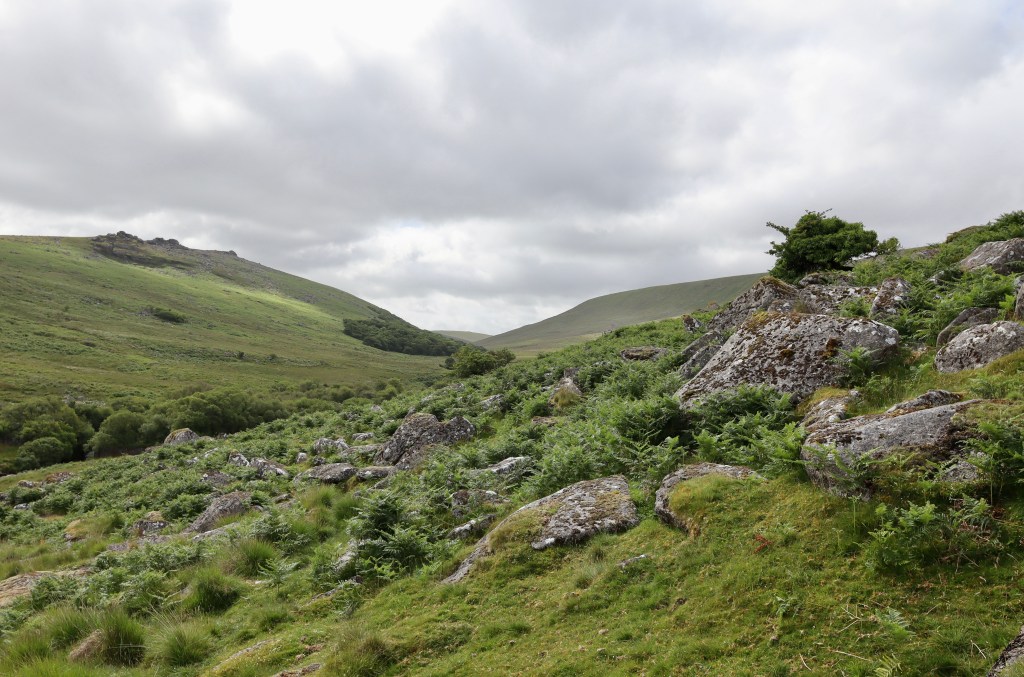
Mindful of the steepness of the slope, and using the flora to determine the underfoot conditions, I carefully make my way along. As I navigate through the peaty ground, the first signs of a track open up and after a few more paces, it becomes visible. The track heads in the direction I want, so I stick to it, but it disappears almost as soon as it arrived. Continuing with my original plan, I continue on, passing alongside Black-a-Tor copse (see post here) and in front of the Slipper Stones, on my way to my destination.
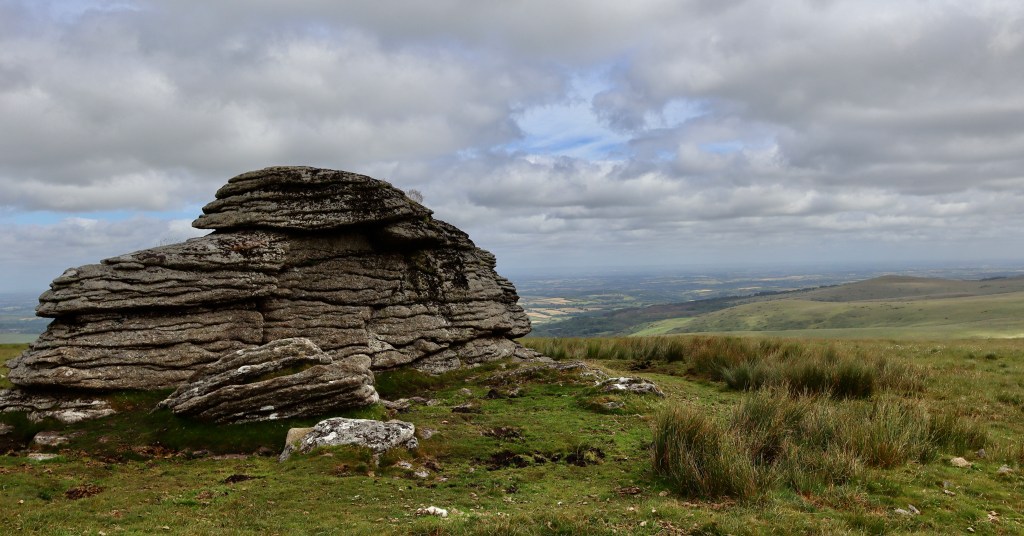
The Slipper stones are a group of exposed granite rocks (which when wet becomes slippery) that sit against the West Okement Valley wall opposite Black Tor and Black-a-Tor Copse. Unremarkable at first, and easy to miss (I would have if not for them being noted on the OS Map and giving a good marker point for my location), the Slipper Stones actually give evidence of a small glacier, the movement of which down the Valley ground the stones smooth. Studies have suggested that Dartmoor had its very own ice cap, with the northern moor undergoing early glaciation in the Quarternary Period, some 2.6million years ago. As ever on the Moor, even the most benign looking of features hid a history and story that can fascinate and inspire.
Not only offering up the interest of the history, the Slipper Stones preside over one of the best views of the West Okement Valley and so I take the opportunity to rest up, before I head onto my search for the Liberator wreckage.
The PB4Y-1 Liberator 63926 Crash Site
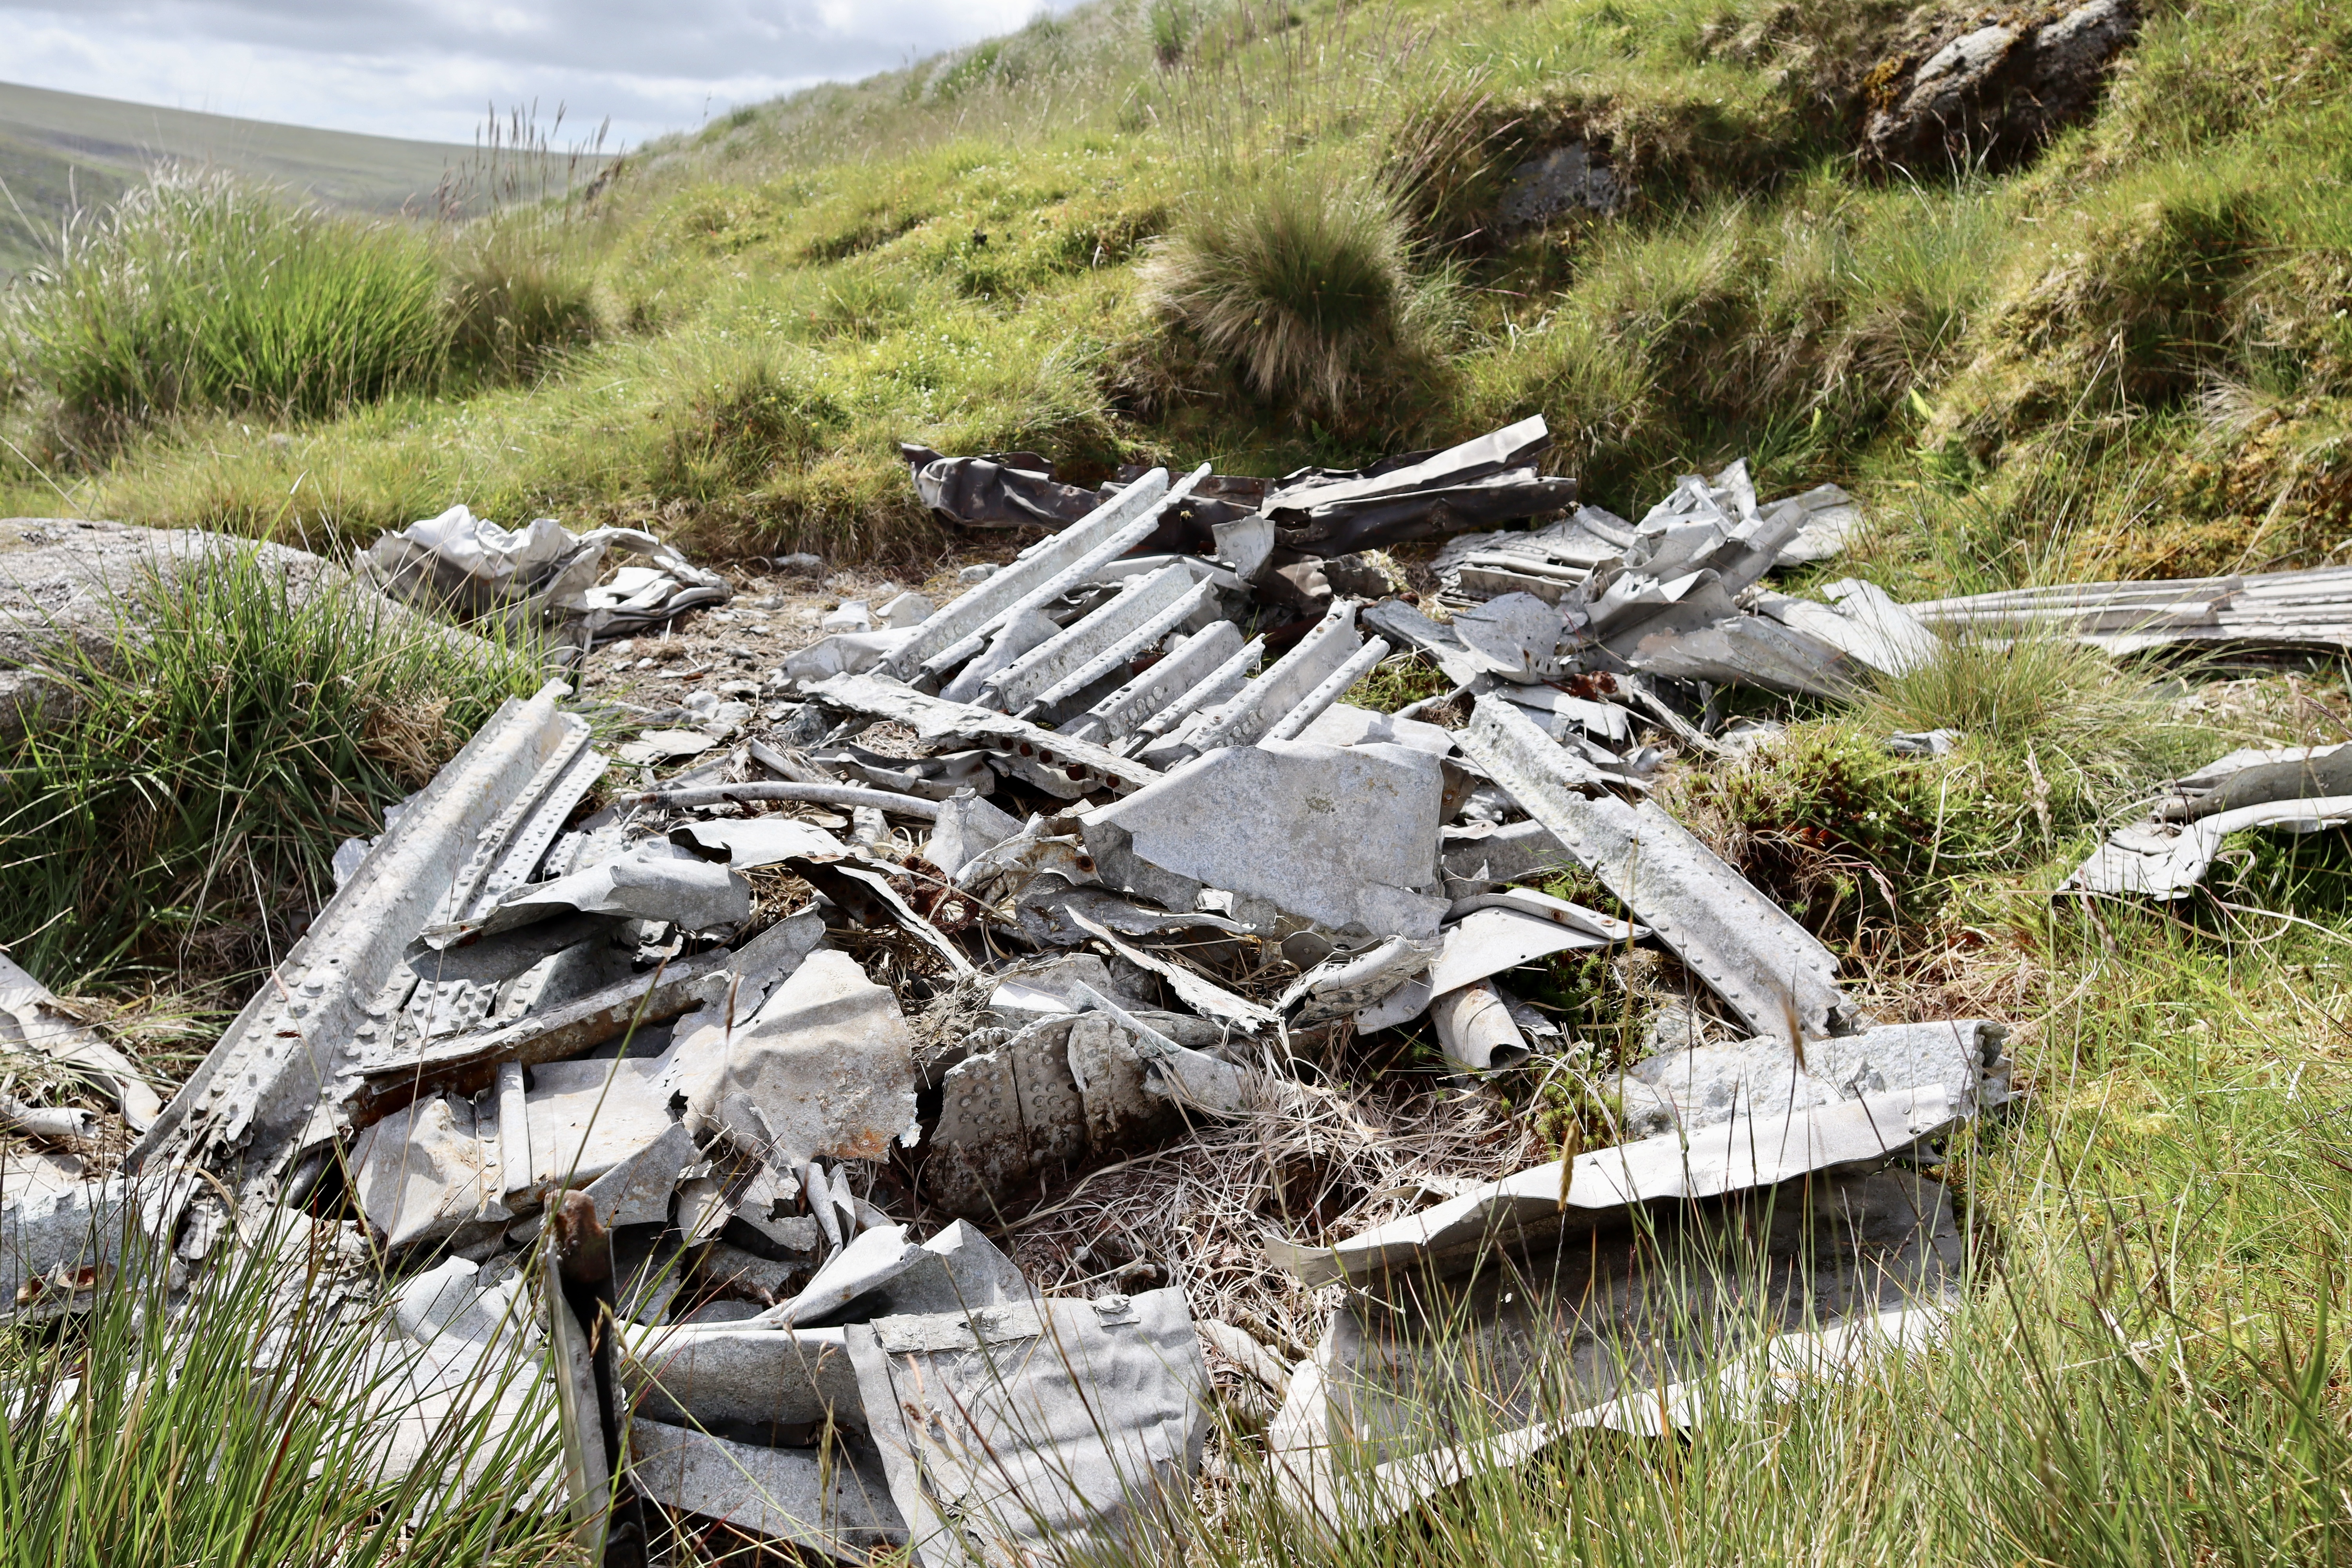
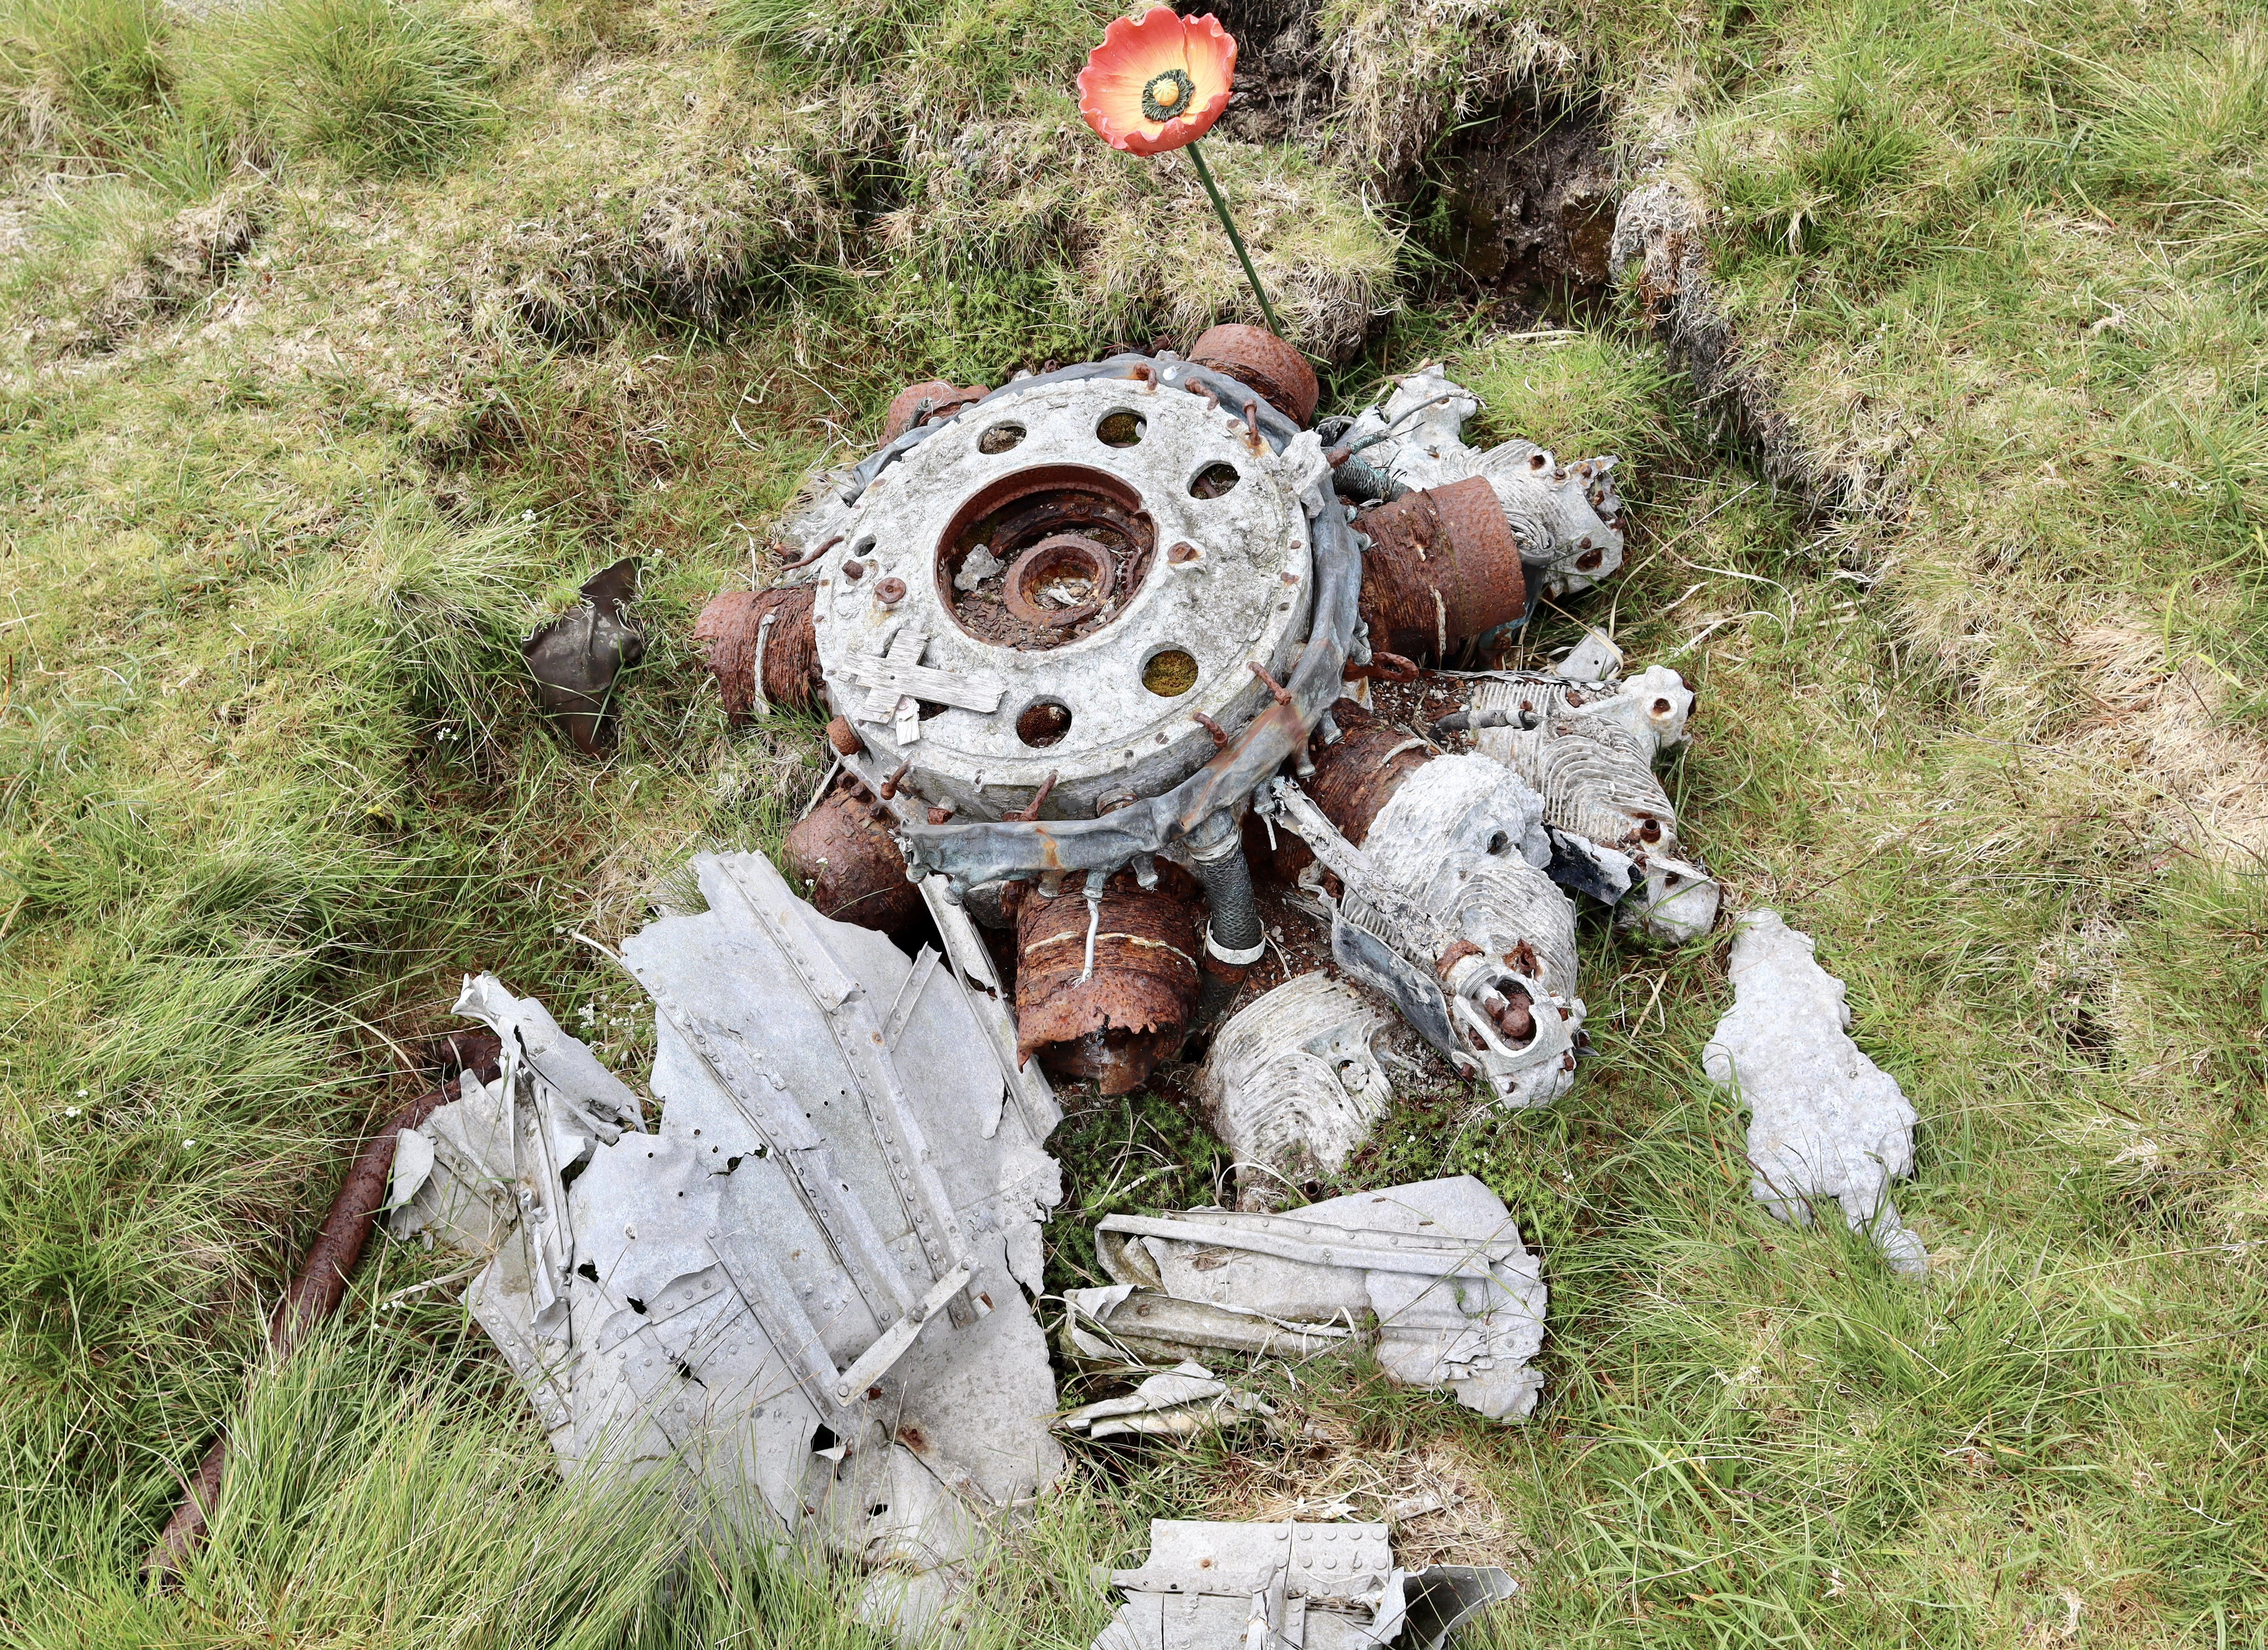
The opposite bank to the end of Black-a-Tor Copse marks the starting point of my search for the Liberator Bomber (PB4Y-1 63926). The PB4Y-1 Liberator 63926 wreckage is strewn across the valley side and not marked on the map so the only approach is a liberal search and keeping my eyes open. The search is helped by the stark appearance of a flash of red, a lone poppy sculpture left as a mark of respect and remembrance for the 10 men who tragically lost their lives this day.
On the 28th of December 1943, US Navy PB4Y-1 Liberator 63926 crashed in the West Okement Valley, between Steng-a-Tor and the South end of Black-a-Tor Copse, resulting in the death of all 10 men on board. The aircraft was on a return journey to its base in Dunkeswell, having formed a part of a flight of fifteen bombers, on a mission to find and destroy eleven enemy destroyers located in the Atlantic. Whilst patrolling, PB4Y-1 Liberator 63926 became engaged with x2 enemy fighters, and after the exchange of shots, PB4Y-1 Liberator 63926 was able to turn for home, having successfully completed their mission.
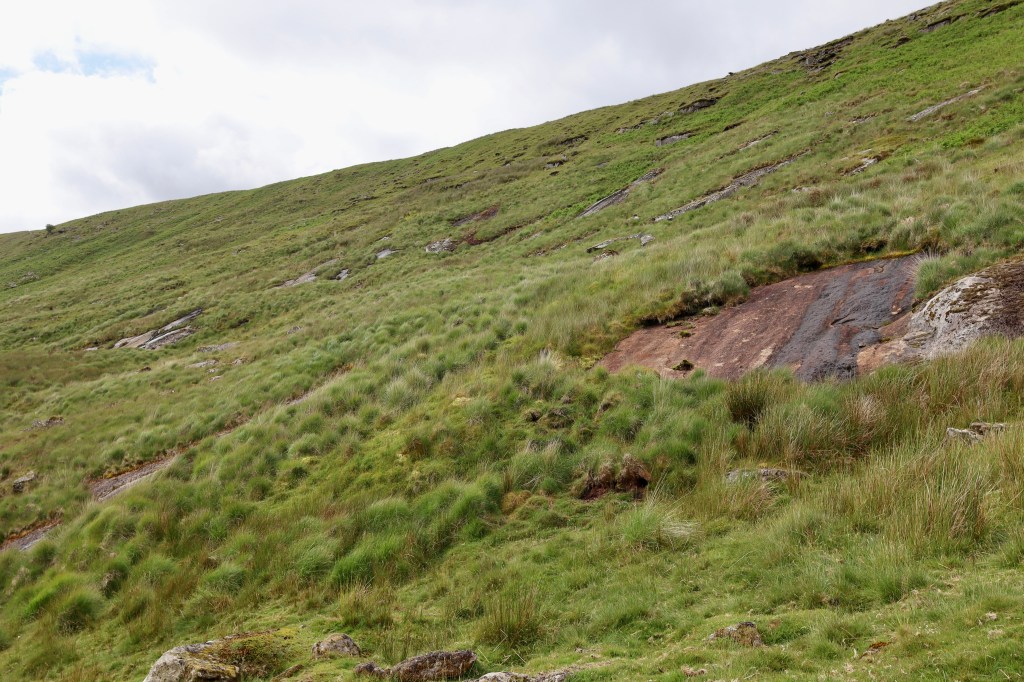
It was during this return that the tragedy occurred. After crossing the coastline of South-West England the aircraft took an easterly course towards home. At 22:15, flying control and Dunkeswell received a message from the pilot Lieutenant William Parish to advise their estimated time of arrival as 22:20. As PB4Y-1 Liberator 63926 passed over Dartmoor, a thick fog descended and for reasons unknown, the aircraft into the hillside. Given the direction of travel, and eventually crash site, it is speculated that PB4Y-1 Liberator 63926 must have hit Woodcock Hill at a shallow angle, crashing on the hilltop but then sliding for a quarter of a mile before going over the edge of Corn Ridge descending, ending on the steep side of the valley.
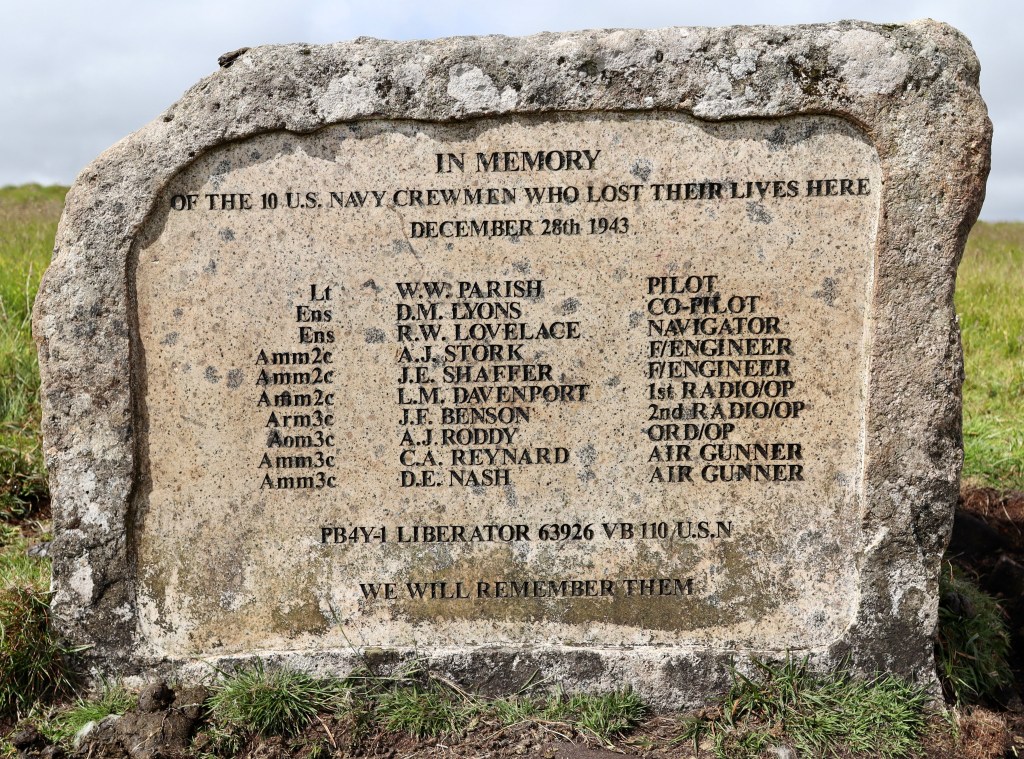
The crew of PB4Y-1 Liberator 63926 consisted of 10 men as below, all who lost their life on this fateful night.
- W. W. Parish (Pilot)
- D. M. Lyons (Co-pilot)
- R. W. Lovelace (Navigator)
- A. J. Stork (Engineer)
- J. E. Shaffer (Engineer)
- L. M. Davenport (Radio operator)
- J. F. Benson (Radio operator)
- A. J. Roddy (Ordnance Operator)
- C. A. Reynard (Gunner)
- D. E. Nash (Gunner)
In the 1960s, much of the wreckage of PB4Y-1 Liberator 63926 was removed from the hillside. However, not all was removed. Following a search exercise by the Devon Aircraft Research Discovery Team in 1973, further pieces of the wreckage were found, including part of the engine, which remains in the location to this day. For those who don’t want to roam around the hill side searching, the wreckage OS Reference is (roughly) SX 56785 88530.

From the crash site, I take the decision that I had to go and visit the PB4Y-1 Liberator 63926 memorial stone, which was placed atop Corn Ridge in 2022. This meant a lung busting, leg burning climb up the at times, near sheer cliff on the side of Corn Ridge. As ever though, Dartmoor rewards hard work and upon reaching the summit, not only can I give respect to the men who died, but the views over which they now preside are truly something wonderful. Sat unobtrusively, almost shyly and hidden, on the edge of the ridge overlooking the site, the memorial stands as an understated, respectful reminder to those men, exhibiting the lack of fanfare that I’m certain they would have approved of.
Branscombe’s Loaf
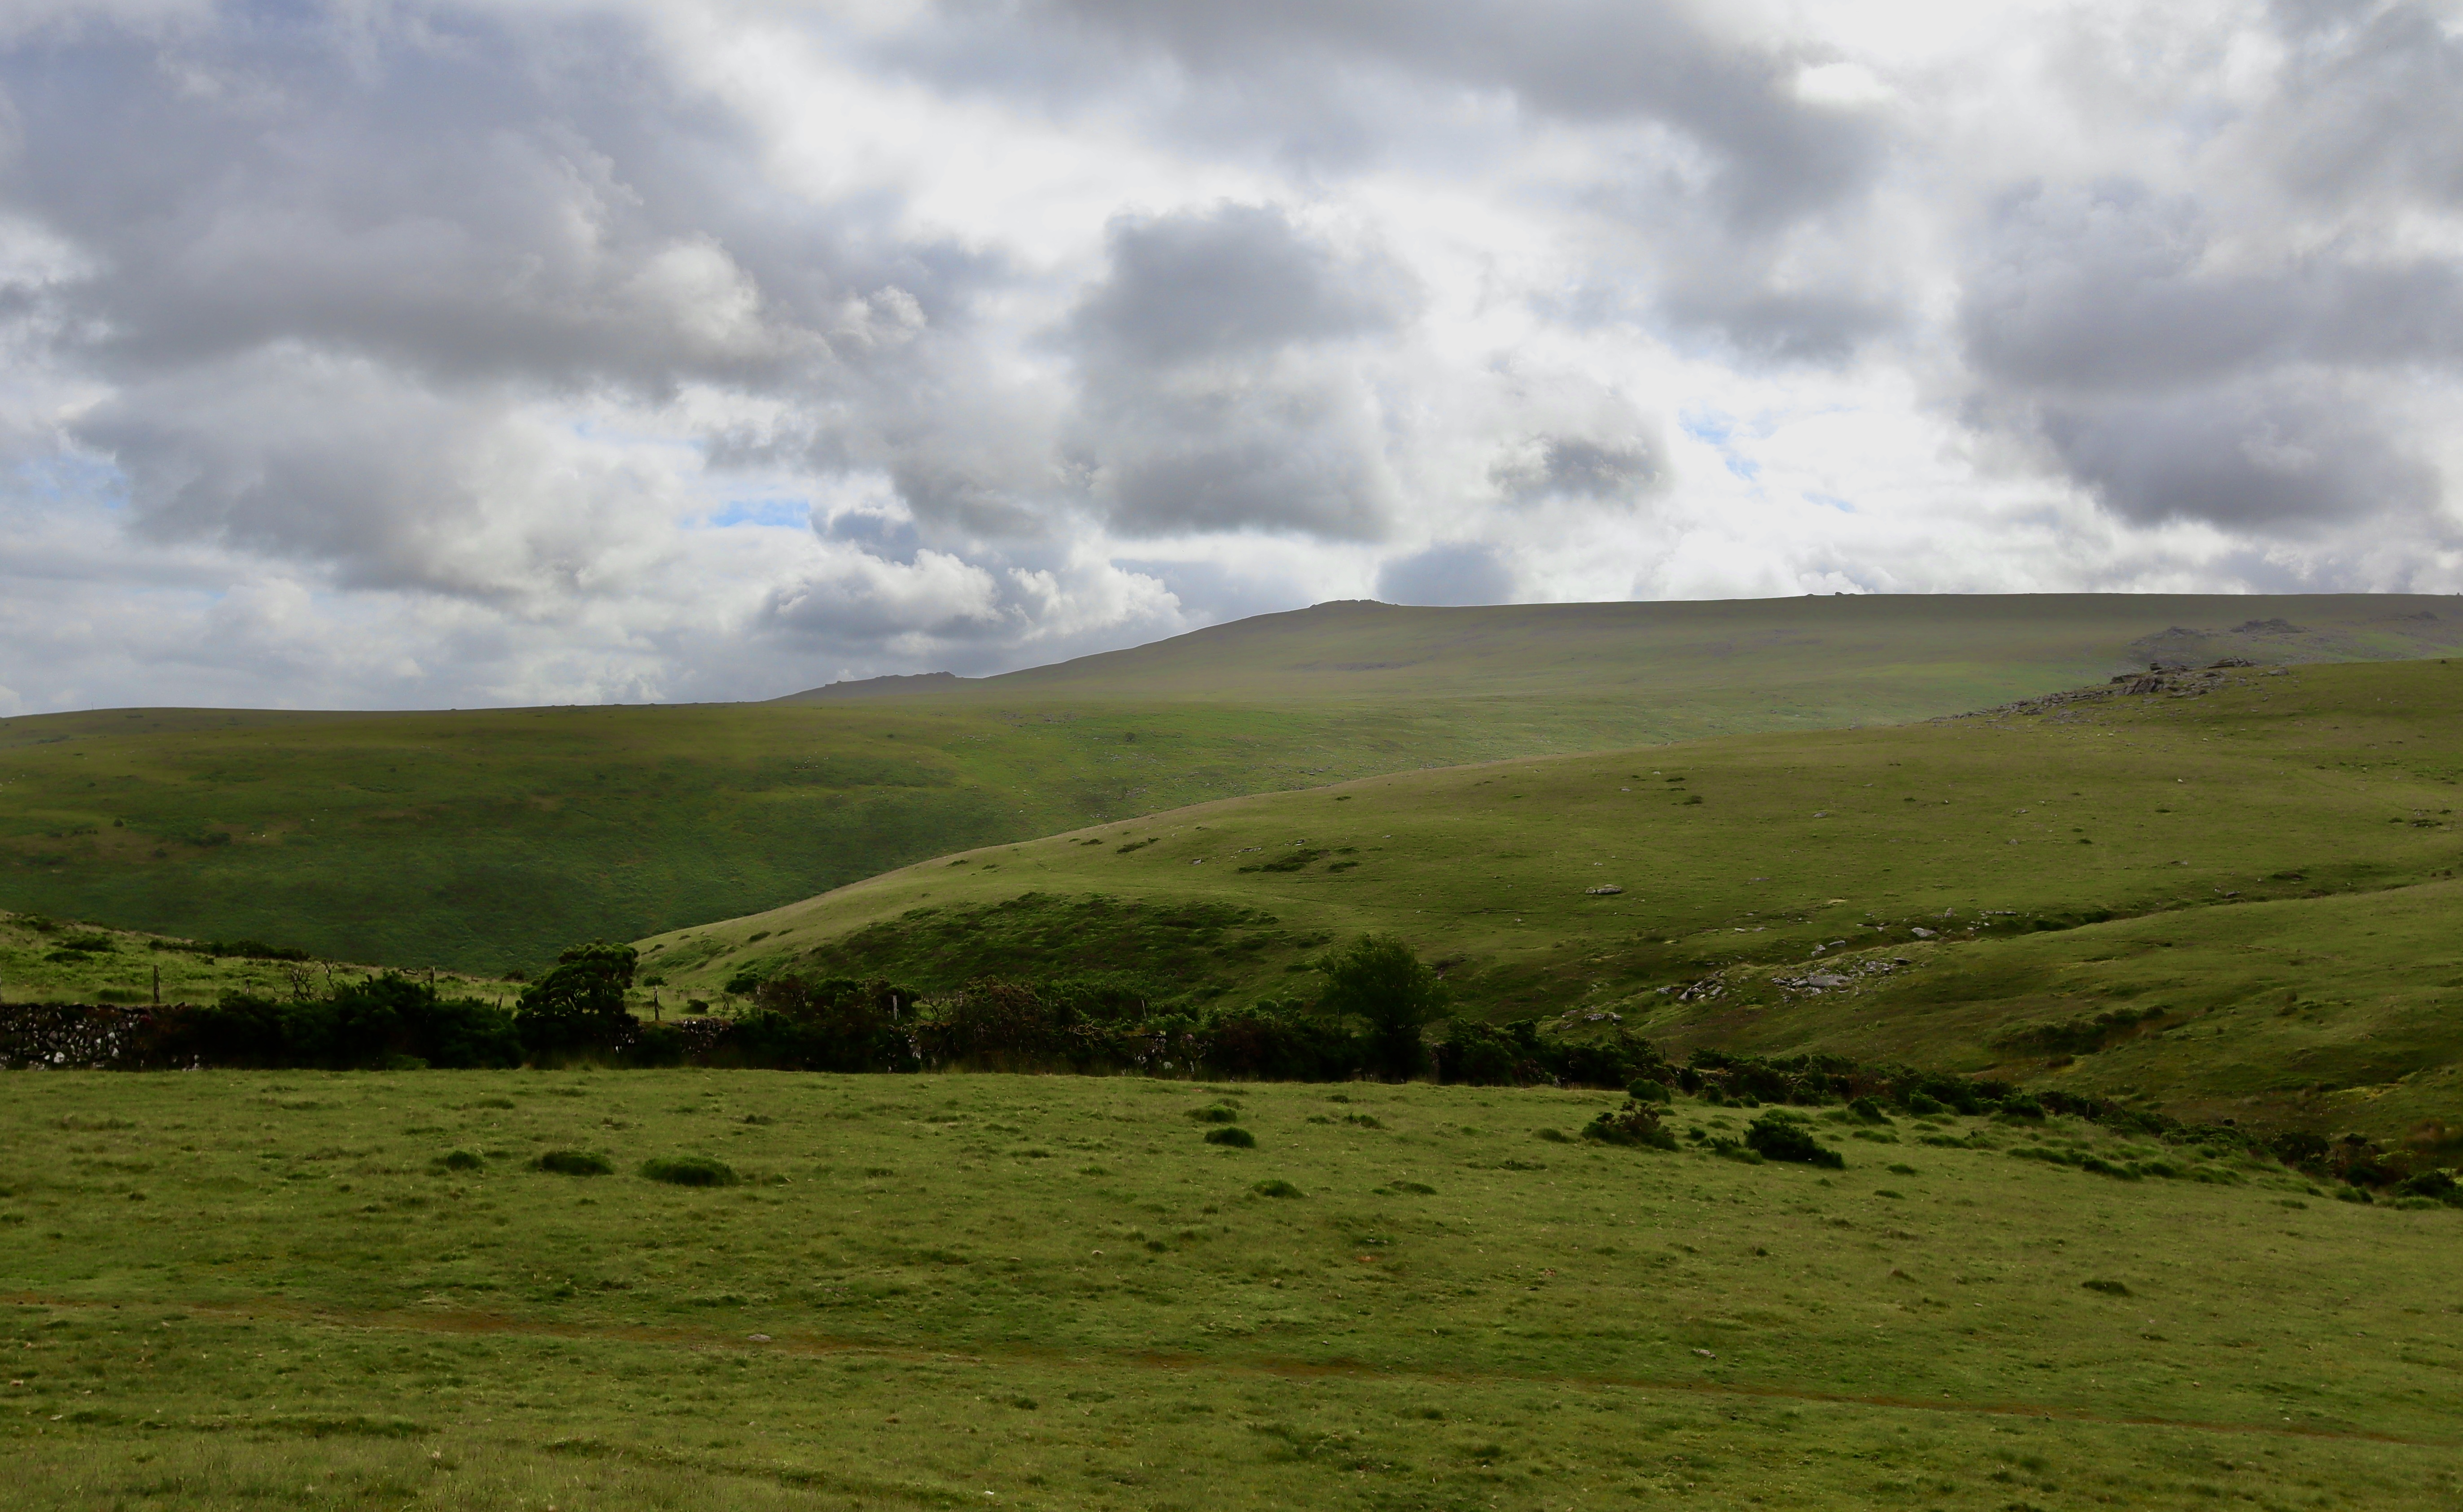
Having reflected, I leave the memorial site and walk along the top of Corn Ridge, across to Branscombe’s Loaf and the cairn that mark the summit. Sitting isolated on the top of Corn Ridge, from afar Branscombe’s Loaf sticks out on the bison, offering sharp contrast to the otherwise undulating edge of Corn Ridge. Passing through a load of bog cotton… yes, it is boggy going, I reach Branscombe’s Loaf.
Branscombe’s loaf sits atop Corn Ridge, and as is only appropriate with any loaf, it is accompanied by hefty slabs of granite cheese. Branscombe’s Loaf, apart from the climbing opportunity it provides, has a great story attached to it, which you can read in my post Branscombe’s Loaf: A Tale of Dartmoor and Devilry.
From Branscombe’s Loaf, I head northeast towards Sourton Tors. Instead of heading up the tors however, I turn to the east along a clear path and take this back to the car.
I saw one other person whilst on this walk, as I was walking back to my car from
Sourton Tors (a route I didn’t initially plan), giving an indication of the isolation of the points this route visits. It is therefore a walk that should be undertaken only if you are confident in your navigation and route-finding abilities. Otherwise, please do get a qualified guide to take you (a little plug for my own services which can be found here).
In signing off this post, I do want to reflect on the walk. A solemnity took over me when I reached the Liberator Crash site, and I will admit to almost feeling a sense of guilt for using it as a point of interest given its sad and tragic history. I hope however that this post can act as a memorial and tribute to those brave men and in some small way offers a mark of respect for the actions they were to take.
| Difficulty | Distance | Navigation Required? |
| Moderate | 9km | Yes |
| Grid Reference | Safety | Footwear |
| Start and Finish – SX 543 910 | Steep Slopes Uneven Underfoot conditions Boggy Ground General Dartmoor Considerations | B1 upwards |


Leave a reply to Anonymous Cancel reply